|
Thanks to LadyValella for allowing me to exclusively translate his tutorials
It was created with Paint Shop Pro X5, but can also be done with other versions of PSP This tutorial is ©LadyValella and cannot be copied to other sites and the same goes for my translation. To translate it I used PSP XII Material here
Thanks to all the creators of tubes who, with their work, allow us to make our creations *** Filters: Does notneed filters *** EXECUTION Place the brush in the Brushes folder located in My filePSP *** LET'S BEGIN...
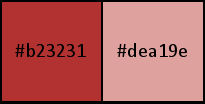
Material palette – Foreground color #dea19e / Background color #b23231
From foreground create a gradient, style Linear
Open a new transparent image of 700 X 500 pixels Fill with the gradient Effect - Distortion Effects - Wave, color #000000
Effects - Distortion Effects - Wave - color #c00000
Open the tube bp_free_png_011 Edit - Copy Edit - Paste as new layer Move a bit to the left and a bit up Same as the picture below
Layers - Properties - Opacity 48 Material Palette Move the VG back to the color and then reverse the colors
Activate preset shape tool rectangle with these settings
View - Rulers Press the Shift and draw this shape Same as the picture below
Objects - Align - Center on canvas Layers - Convert to raster layer Activate magic wand tool - Tolerance and feather "0" Select the center of the square Layers - New raster layer Activate brush tool find the "swirl-rametto brush"
Stamp with the color #b23231 in the selection as well as the picture
Selections-Select None Effects - 3D Effects - Drop Shadow
Layer palette- activate raster layer 3 Activate the magic wand tool and select the dark frame As well as the picture
Layer Palette - Activate raster layer 4 Press delete on the keyboard Keep selection Material Palette - Set the VG to a Gold pattern of your choice Layers - New raster layer Fill a gold pattern Selections - Modify - Contract 2 pixels Press delete on the keyboard Selections - Select none Layers - Merge - Merge 2x down Effects - 3D Effects - Drop shadow, black
Effects - Image Effects - Seamless tiling
Layers - Merge - Merge down Open the tube "swirl_Lv13" Edit - Copy Edit - Paste as a new layer Image - Resize to 60%, all layers unselected Move to the left above Effects - £D Effects - Drop Shadow, black
Open the tube "deko_regis2" Edit - Copy Edit - Paste as new layer Layers - Duplicate Place left below Like the original Layers - Duplicate Image - Mirror Image - Flip Layers - Merge - Merge down Immage - Add Borders - 1 pixel color green Activate magic wand tool - Tolerance and feather "0" - Select the border Fill with the gold pattern Selections - Select none Image - Add borders 25 pixels color light blue color Activate magic wand tool - Tolerance and feather "0" - Select the border
Fill with the gradient linear Selections - Select none Layers - Merge - Merge down Immage - Add Borders - 1 pixel color green Activate magic wand tool - Tolerance and feather "0" - Select the border Fill with the gold pattern Selections - Select none Selections - Select all Selections - Modify - Contract 27 pixel Selections - Invert Layers - New raster layer Effects - 3D Effects - Drop Shadow, black
Still give drop shadow but changing vertical and horizontal to - 5 Selections - Select none Open the tube "mela" Edit - Copy Edit - Paste as new layer Place as the finished image Open the tube "logoLV" Edit - Copy Edit - Paste as new layer Place your Watermark or Name Layers - Merge - Merge all layers Save as IPG *** If you have problems running the tutorial or just want to tell me you liked it, write me
*** translated 01/22/2023 *
|